New York-style Cheese Pizza

Pizza in New York City is as diverse as its residents — Neapolitan to neo-Neapolitan, square to bar, Roman to focaccia, grandma and more — stretching across cultures far and wide. But it’s hard to argue any of them are more iconic than the classic New York-style pizza, a large and sturdy base topped with tomato sauce, plenty of low-moisture shredded mozzarella, and sold, usually, by the slice.

The history of pizza in New York City is equally rich and extensive. Founding cornerstones include Lombardi’s in Little ItalyTotonno's in Coney IslandJohn's of Bleecker Street in Greenwich Village, and Patsy's in Harlem. Traditionally, the pizzas were cooked in coal ovens, but gas ovens eventually came to dominate, opening the city to a proliferation of pizzerias it’s still famous for today. 

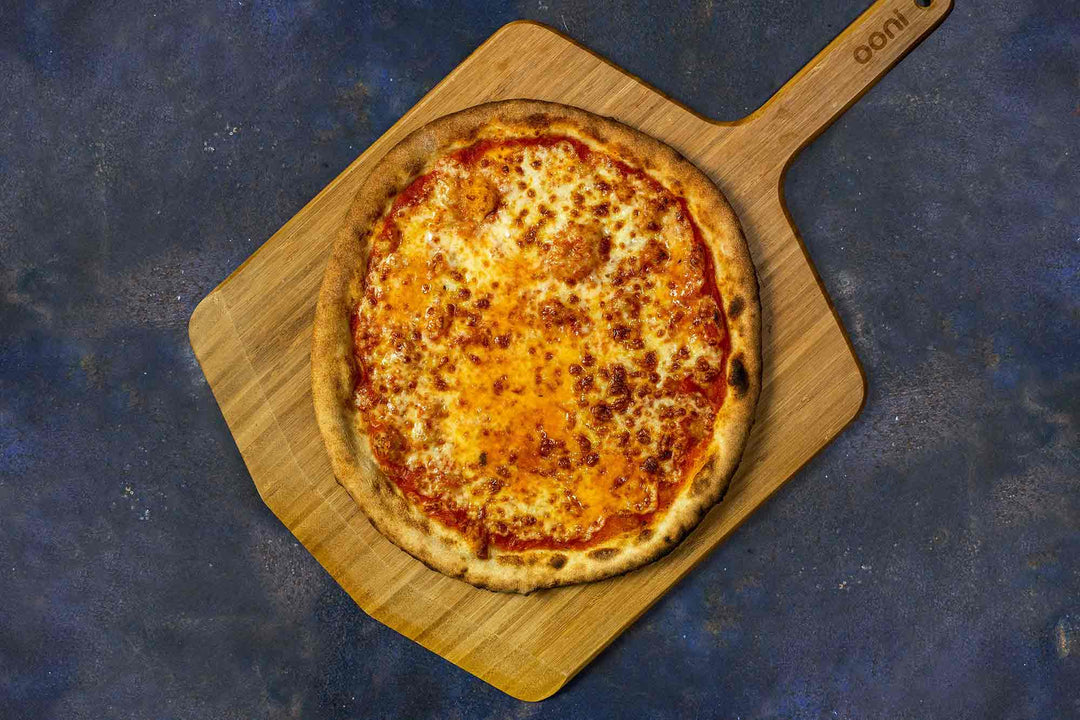
The recipe for pizza in New York City was adapted to perform in more consistent, less aggressive heat (compared to coal or wood) and requires a longer bake. The crust is thicker than that of Neapolitan pizza, with enough structure to support generous amounts of toppings. The dough is often enriched with olive oil and sugar, providing extra flavour, volume and colour. The favoured cheese is low-moisture whole milk mozzarella (fresh mozzarella doesn’t do as well during long bakes),  spread right to the edge, and common accoutrements offered post-bake usually include dried oregano, chilli flakes, and finely grated Parmesan. 

This recipe, developed at Ooni HQ with the help of Ooni’s head of engineering, Mike Vaona, is a nod to today’s classic New York cheese pizza, using bread flour enriched with olive oil and sugar, cold-proofed overnight, and baked low and slow. The sauce has a thick consistency, since it's cooked over low heat. With less moisture in the sauce, this helps retain a sturdy crust while the pizza cooks over a longer period. The addition of sugar, butter and oil all help smooth the texture and flavour to balance the generous serving of low-moisture mozzarella. 

New York-style Cheese Pizza

Note

Both the dough and sauce require refrigeration overnight, so plan ahead.

1. If using a mixer: To make the dough, combine the water, yeast, salt and sugar In the bowl of an electric mixer.

If using a mixer:

To make the dough, combine the water, yeast, salt and sugar In the bowl of an electric mixer. Add the flour and, using a dough hook attachment, mix on a low speed until the liquid is completely absorbed. Add the olive oil and continue mixing on low speed for 5 minutes, or until the dough is smooth, elastic and only slightly sticky.

If mixing by hand:

Add the water, yeast, salt, and sugar to a large bowl and mix with a wooden spoon until combined (roughly 5 minutes). Add the olive oil and knead with your hands for 5 to 10 minutes.

2. Turn the dough onto a lightly floured work surface and divide it into 2 or 3 equal portions, depending on the size of pizza you want.

Shape each portion into a ball, place in an airtight container and cold proof in a refrigerator for 24 to 72 hours, or until the dough doubles in size. Remove it from the fridge 1 to 2 hours before baking.

3. To make the sauce, melt the butter with the olive oil in a saucepan over a medium heat.

Add the garlic, oregano and salt, then stir until fragrant ( about one minute). Using your hands (or a meat chopper, potato masher or tomato mill, if you have any of these), crush the tomatoes in a bowl, then add to the pan. Add basil, onion powder and sugar and stir. Bring the mixture to a low boil, reduce the heat to low, and simmer for 45 minutes to an hour, until the sauce has reduced by about half. Remove the basil, taste the sauce and adjust the seasoning as needed. Allow the sauce to cool, then store in an airtight container in the fridge.

4. On the day you’re ready to cook, remove the dough and sauce from the refrigerator at least two hours before cooking to allow them to reach room temperature.

5. Fire up your oven.

Aim for 370˚C on the stone baking board inside.

6. On a lightly floured work surface, stretch the dough out to your desired size and lay it on a lightly floured pizza peel.

Starting from the center and spiraling out toward the edge, ladle 5 to 6 tablespoons of sauce evenly across the base, stopping about 2 centimeters from the edge. Scatter an even layer of cheese over the top of the sauce.


7. If cooking with gas:  Launch the pizza and turn the gas off.

If cooking with gas:

 Launch the pizza and turn the gas off. Bake until the base takes on a good colour (roughly 4 minutes, turning halfway). Once the base is done, turn the gas to medium or high (depending on your preference of crispness) and cook for another minute or two, turning regularly until the crust is crisp and golden brown. 

If cooking with wood and or charcoal:


When the fire dies down, launch the pizza and close the chimney baffle to kill the combustion, this will allow the base to cook through without overcooking the top. Bake until the base has a good colour (4 minutes, turning halfway). Once the base is done, add more fuel and open the chimney baffle to increase the flame. Bake for a further 1 to 2 minutes in the higher heat, turning regularly, to achieve a crisp and golden brown crust.

8. Remove the pizza from the oven, slice, and serve with any additional post-bake toppings of your liking.